 |
| DIY Foaming Hand Soap: A Step-by-Step Guide for a Fun, Eco-Friendly Clean |
DIY Foaming Hand Soap: A Step-by-Step Guide for a Fun, Eco-Friendly Clean
Creating your own foaming hand soap is a rewarding project that lets you control the ingredients, cut down on packaging waste, and add a personal touch to your daily routine. In this guide, you'll learn how to make a quality, easy-to-use soap that produces a rich, bubbly foam every time you press the pump. Whether you’re new to DIY projects or have tackled similar tasks before, this guide offers clear steps, practical tips, and answers to common questions.
Why Make Your Own Foaming Hand Soap?
- Cost Savings: Making soap can be much cheaper than buying commercial brands.
- Environmental Benefits: You help reduce plastic waste by reusing a foaming dispenser.
- Customization: Adjust the scent, color, and ingredients to suit your skin and personal style.
- Control Over Ingredients: You decide what goes into your soap, avoiding unwanted chemicals.
Materials and Tools You’ll Need
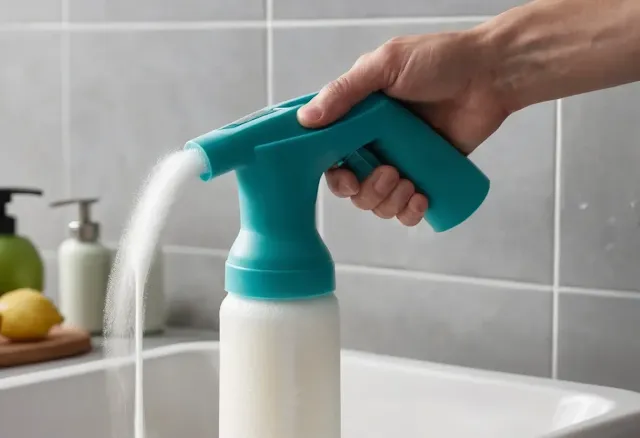
- Foaming Dispenser: A refillable pump bottle that converts liquid soap into foam.
- Image alt text: Clear foaming dispenser filled with homemade hand soap.
- Liquid Castile Soap: A gentle, vegetable-based soap that forms the base.
- Distilled Water: Prevents any impurities that might come from tap water.
- Essential Oils: Choose your favorite scents, such as lavender, lemon, or peppermint.
- Vegetable Glycerin (Optional): Adds extra moisture to the soap.
- Measuring Cup: For accurate measurement of liquid ingredients.
- Funnel: Helps transfer the liquid into the dispenser without spills.
- Mixing Bowl or Jug: To combine the ingredients.
Step-by-Step Guide for Making Your DIY Foaming Hand Soap
Step 1: Gather Your Ingredients
- Measure out the distilled water: Typically, fill about 2/3 of your mixing container with distilled water.
- Add the Castile soap: Use roughly 1/3 of the container’s volume. For a milder soap, you might want to use a bit more water.
- Essential oils: Add 10-15 drops of your chosen essential oil. Feel free to mix scents for a unique fragrance.
- Vegetable Glycerin: If you choose to include it, add 1 teaspoon. This ingredient helps lock in moisture for your skin.
Step 2: Mix and Prepare
- Combine the Water and Soap: Pour the distilled water into the mixing bowl. Slowly add the liquid Castile soap while stirring gently. Avoid stirring too quickly to prevent creating too many bubbles.
- Add the Essential Oils and Glycerin. Stir the mixture slowly to distribute the oils and glycerin evenly. A consistent blend will result in a smooth, rich foam when dispensed.
- Taste Test (Optional): While you shouldn’t taste soap normally, doing a quick smell and touch test can confirm if the scent and texture are right for you.
Step 3: Transfer to the Foaming Dispenser
- Avoid Overfilling: Leaving some space at the top ensures the pump can work properly.
- Test the Dispenser: Press the pump a few times to see if the foam forms nicely. If the foam seems too thin, you may adjust it by adding a bit more Castile soap next time.
Tips for Customizing Your Hand Soap
Scent Variations:
- Use lavender for a calming aroma.
- Mix lemon and eucalyptus for a refreshing, clean scent.
- Combine peppermint and tea tree oil for an invigorating feel.
Color Adjustments:
- Add a drop or two of natural food coloring if you want a visually pleasing soap.
- Remember to use only a small amount to avoid altering the foam texture.
Extra Moisturizing:
- A bit more vegetable glycerin can make the soap richer in moisture, especially if you have dry skin.
Natural Additives:
- Some users add a few drops of aloe vera juice for extra skin benefits.
The Benefits of DIY Foaming Hand Soap
Cost-Effective Cleaning
When you buy commercial hand soaps, you often pay for the brand name and packaging. With a DIY version, you only spend on raw ingredients. Over time, this can lead to significant savings, especially if you make soap in larger batches.
Better Control Over Ingredients
Creating your own soap gives you the chance to avoid certain chemicals that might be present in store-bought products. You choose natural, skin-friendly ingredients that work well for your personal needs. This control is particularly useful if you have sensitive skin or specific allergies.
Reduced Waste and Environmental Impact
Personal Satisfaction
A Few Extra Tips for a Smooth Process
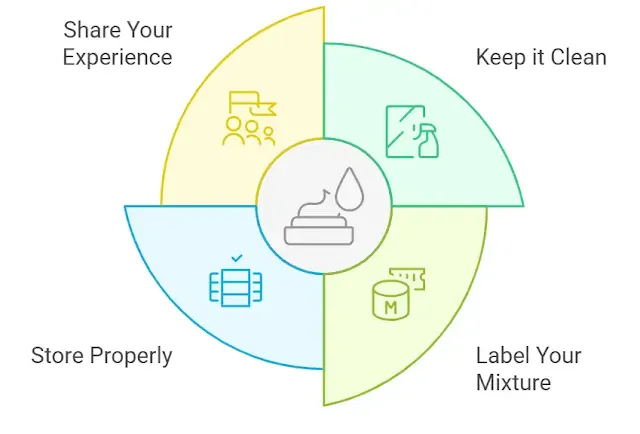
- Keep it Clean: Ensure that all your tools and containers are well cleaned before mixing. This helps prevent any contamination in your soap.
- Label Your Mixture: If you plan to experiment with different scents or formulas, label each batch with the ingredients and date.
- Store Properly: Keep your dispenser in a cool, dry spot to maintain the soap’s consistency over time.
- Share Your Experience: If you’re happy with your DIY foaming hand soap, share your recipe and tips with friends or on social media. Your story might inspire someone else to try a similar project.
Final Thoughts
Creating your own DIY foaming hand soap is a fun project that brings together creativity, savings, and environmental care. With a few simple ingredients and clear steps, you can produce a soap that not only cleans your hands but also brightens your daily routine. This guide has shown you how to mix, customize, and store your soap, ensuring a reliable product every time you pump.
Remember, the beauty of this project lies in its flexibility. Experiment with different scents, colors, and additives until you find the perfect match for your lifestyle. Whether you’re making soap for your home or as a thoughtful gift, the process offers a satisfying way to take control of what you use on your skin every day.
Ready to Get Started?
Key Takeaways:
- Simple Ingredients: With distilled water, liquid Castile soap, essential oils, and optional vegetable glycerin, you have everything you need to make quality foaming hand soap.
- Easy Steps: Follow a three-step process: gather, mix, and transfer. Adjust the formula to suit your preferences.
- Customization: Tailor your soap with different scents, colors, and additives to match your style and skin needs.
- Environmental Impact: Reduce plastic waste by reusing dispensers and making eco-friendly choices.
- Cost Savings: Enjoy significant savings over store-bought soap while knowing exactly what’s in your product.
By following this guide, you are taking a step toward a more hands-on and thoughtful approach to your daily cleaning routine. Enjoy the process, experiment with new ideas, and take pride in creating a product that works for you and your family.
Frequently Asked Questions
Is it cheaper to make your own foaming hand soap?
Yes, making your own foaming hand soap is generally more budget-friendly. When you buy ingredients in bulk and reuse a foaming dispenser, the overall cost is often much lower compared to purchasing branded products. This approach can help you save money over time while letting you customize the scent and ingredients.
Is foaming soap just watered-down soap?
Not exactly. Foaming soap is designed to mix water and soap at the right ratio to produce a rich, airy foam that cleans your hands effectively. While the formula does include water, it isn’t simply diluted soap—it's a carefully balanced mixture that ensures you still get a good clean without using too much product.
Can you turn regular liquid hand soap into foaming soap?
Yes, you can convert regular liquid hand soap into foaming soap. To do this, mix the liquid soap with water (typically about one part soap to four parts water) and use a foaming dispenser. Keep in mind that the foam quality may vary based on the soap’s formulation. Experiment with the ratio to find the right balance for your chosen soap.
Is foaming soap less effective?
No, foaming soap is not less effective. The foaming action actually helps distribute the soap evenly over your hands, making it easier to lather and rinse off. As long as the soap you use contains the proper cleaning agents, the foaming version cleans just as well as the regular liquid form.


